
Sunday, October 30, 2011
Background
Here is the background for one of my upcoming surreal composites. Very happy with how the lighting is working in this! Particularly as the foreground was shot in the middle of the day with no clouds.

Saturday, September 17, 2011
Sun
Playing around with fireball tutorials for my 'Sun Goddess' surreal shot.
The tutorials I checked out:
http://www.developertutorials.com/tutorials/photoshop/creating-a-realistic-sun-in-photoshop-113/
http://www.tutorialwiz.com/sun/


The tutorials I checked out:
http://www.developertutorials.com/tutorials/photoshop/creating-a-realistic-sun-in-photoshop-113/
http://www.tutorialwiz.com/sun/
3 Lands
Abstract images of grass, snow and sand. I created these for use as prints on the wall, as I really like the simple colours and shapes. These images may feature in my Fusion Video.


Cyanotypes How To
Here is a brief run down on how I create my cyanotypes.


What you will need:
- Potassium Ferricyanide
- Ferric Ammonium Citrate
- Paper, textiles or other absorbent material
- Copier paper
- Sheet of glass
- 2 brown Glass bottles, mixing bowls, spoons, scales, washing line, pegs
Step 1: Creating the negative
In order to create my negatives I used digital infrared photos I had taken, as they are very contrasty. As you can't get a large tonal range with cyanotypes using images with high contrast is very important in order to create an effective image. To create my negative I take my photograph, increase the contrast and invert it. I then make it black and white by adding a monochrome Channel Mixer adjustment layer.
It should look something like this:

Step 2: Printing the negative
I then printed my inverted image just on regular paper, and photocopied it onto transperent copier paper. I created my negatives this way as it means I had complete control over size (If I used actual film negatives it would be much harder to control my image, and the size as I would have to shoot what I wanted straight onto large format film).
Step 3: Mixing the chemicals
(As we are using light sensitive chemicals, the next 3 steps must be done in the dark, or using a safe bulb.)
The first step is to mix up the two chemicals. Measure 25g of Ferric Ammonium Citrate and mix with 100ml of water, then measure 10g of Potassium Ferricyanide, mix with with 100ml water and store in an airtight dark bottles. This recipe will make approximately 50 8x10 prints, but the chemicals will not last very long, so make sure to store in a cool dark place.
Step 4: Making the solution
To make the light sensitive solution, mix equal quantities of the two chemicals in a bowl.
Step 5: Painting the paper
Next take your negative and mark out the corners lightly on the paper, this shows us the area we want to paint inside. If you want clean edges you can use masking tape and mask off the areas you dont want to paint. I like messy edges though so I do this step very roughly, as I find textured edges much more effective.
We then paint our chemical solution over the paper and leave it to dry in a dark place overnight.
Step 6: Exposing the negative
The next day we take our paper out, make sure its dry, and place our negative over the top. Place a sheet of glass over the top so the negative doesn't bow or slip. Then leave it in direct sunlight for 10-15 minutes.
Step 7: Washing
Once the sunlight as exposed our paper we need to wash the excess chemicals away. Wash in running water until the water runs clear, and hang up the paper to dry.
Once the paper is dry you should end up with a beautiful blue cyanotype!

Iron & Wine CD Cover

Here is the CD cover I designed for the band Iron & Wine. I have been experimenting with cyanotypes recently, and I decided to use a couple for this CD cover, as it worked well with the artistic look I was going for. Iron & Wine is Indie Folk Rock, and has a very natural acoustic sound to it, so I wanted the image to reflect the sound of the music.
Tuesday, May 31, 2011


Wednesday, May 25, 2011

Monday, May 16, 2011

Sunday, May 15, 2011


Saturday, May 14, 2011


Monday, May 2, 2011
Campari Advertisement Background
Quick background idea for my Campari advertisement. This is the tower for my Rapunzel, so now the idea is to have her leaning out the window with a campari cocktail and a man holding up a campari bottle on the left.


Wednesday, April 20, 2011
Car Advertisement Change
I've had to change my automotive advertisement composite idea, as I dont have the time to create my original 'Subaru' campaign, as creating a robotic person will be extremely difficult.
I will still be doing an Car advertisement, but instead I will be doing it for a Toyota Prius campaign, this is because I think the campaign is amusing, and I have easy access to the car.


The campaign slogan is 'Well atleast he drives a Prius' and depicts a person doing something morally questionable, but it's alright as they drive a fuel efficient car! For my idea I am going to have my Prius as a 'get away vehicle' for a bank robbery. I will probably only need two shots for this idea, as I will most likely shoot the car on location, then shoot the robber in the studio.
Images from: http://www.advertolog.com/search/?q=Toyota+Prius
I will still be doing an Car advertisement, but instead I will be doing it for a Toyota Prius campaign, this is because I think the campaign is amusing, and I have easy access to the car.
The campaign slogan is 'Well atleast he drives a Prius' and depicts a person doing something morally questionable, but it's alright as they drive a fuel efficient car! For my idea I am going to have my Prius as a 'get away vehicle' for a bank robbery. I will probably only need two shots for this idea, as I will most likely shoot the car on location, then shoot the robber in the studio.
Images from: http://www.advertolog.com/search/?q=Toyota+Prius
Tuesday, April 19, 2011
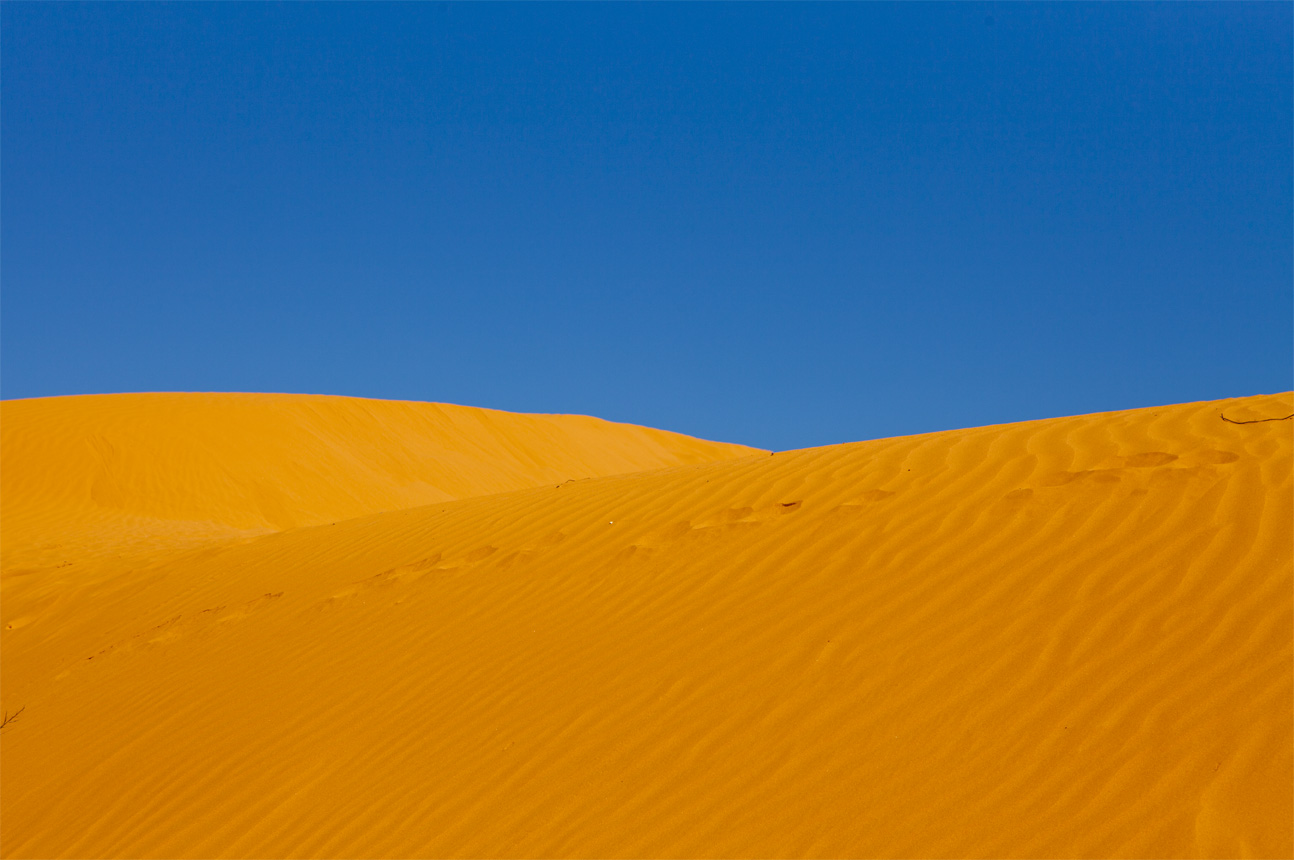
Desert Background
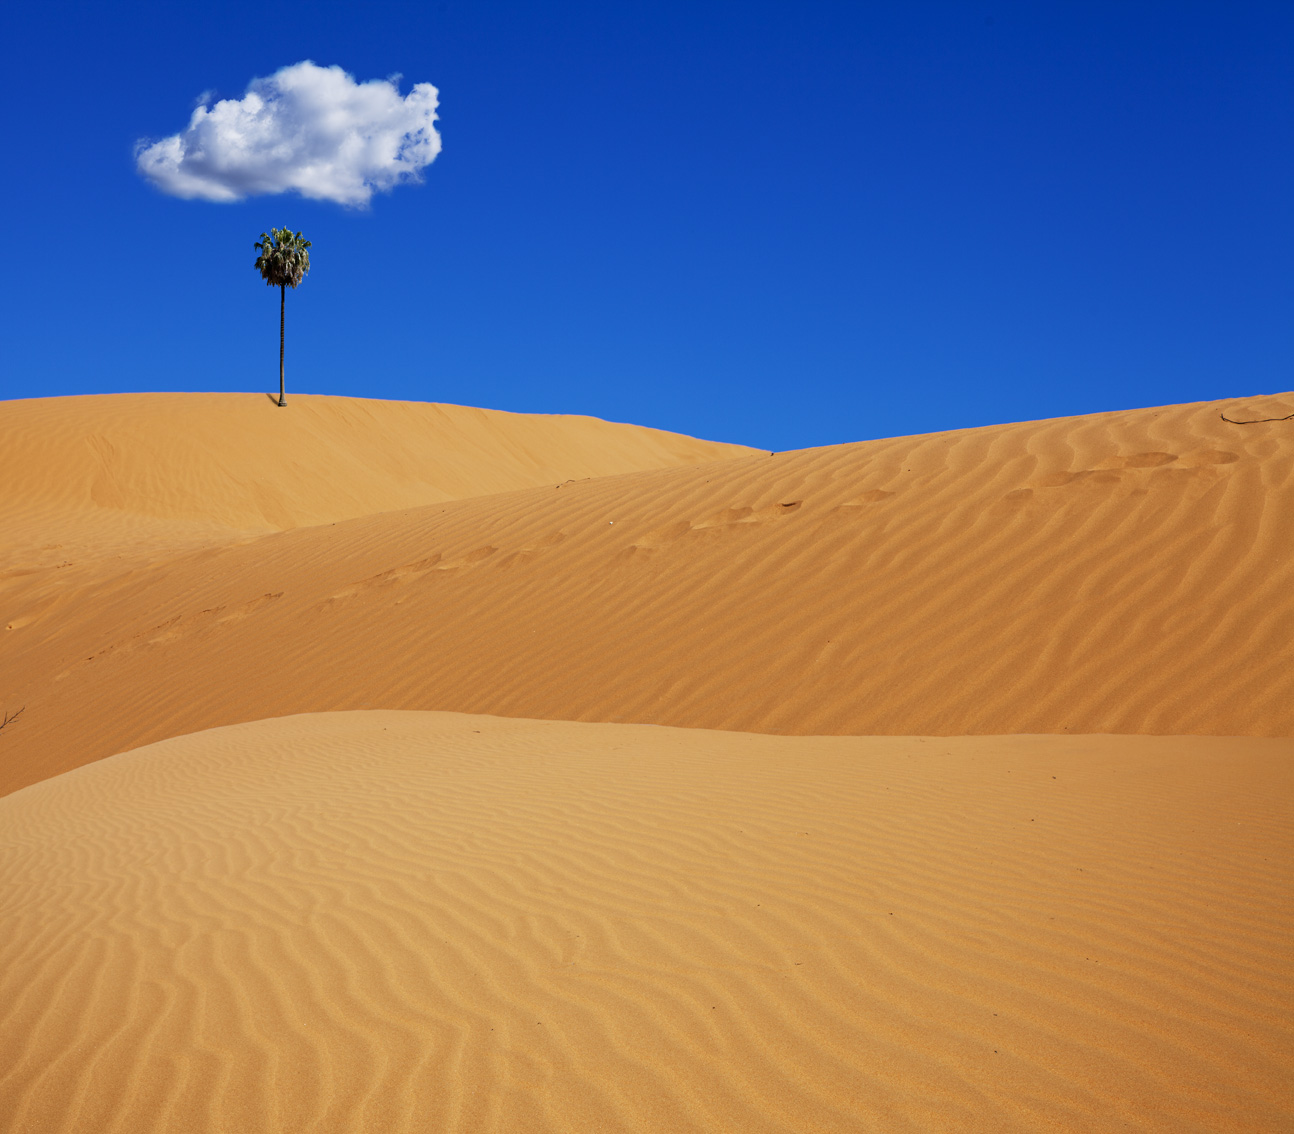
Here is the background plate for my desert composite. So now the plan is to add a person on a horse in the foreground, heading towards the tree. I don't know if it needs something extra? Like an object under the tree.. I wont really know until I put the person in.
**When uploaded to Blogger the colour cast changed dramatically, so the saturation and colour balance is very off in this image.**
Wednesday, April 6, 2011
Circus Mood Board
Here is the mood board for my magazine cover of the clown. The idea is to have a clown / jester at the front with lots of different 'circusy' things in the back, including circus tents, balloons, a lion, a ferris wheel etc. I will probably colour cast the entire background a sepia / yellow tone and apply a texture, just to make it a bit more gritty.


Tuesday, April 5, 2011
VIC Summary
Just got back from a week in Victoria shooting background plates and stock images for my composites. Overall the trip went well, but I had a couple speed bumps along the way.

Highlights


Highlights
- Exploring the city of Melbourne
- Driving along the Great Ocean Road

Lowlights
Road closure - I drove the 4 hours from Port Campbell to Halls Gap (Grampians National Park), only to find when I neared that the road was closed, which was rather annoying, so I took a 2 hour detour in order to get to Halls Gap and I finally made it. It was rather late when I arrived so I stayed the night, and I awoke at 5:30am to catch the sunrise only to find that all roads into The Balconies lookout were closed due to flood damage. So I got no photos at The Grampians, which was very disappointing because it looks like such a beautiful place.
So I wasn't able to get the image I wanted for one of my composites, and as the premise of this composite was basically an excuse to go to that specific location, I can't shoot it anywhere else. Therefore I have decided to replace this composite with my UN competition images.
So I wasn't able to get the image I wanted for one of my composites, and as the premise of this composite was basically an excuse to go to that specific location, I can't shoot it anywhere else. Therefore I have decided to replace this composite with my UN competition images.
What I could improve
I did extensive research before I left and found no road closure information about the Grampians, despite going on the official visitors center website. Even when I got there I went to the visitors center; it was closed but there was absolutely no signage. The man at the place I stayed didn't mention anything either. Only after I got there and searched the internet 'Road Closure at Grampians' did I find any information, and even then they made it difficult. So as far as improving goes, I think I took the required precautionary action, however I will probably now be paranoid about future road trips so I will specifically check for road closures next time.
Monday, March 28, 2011
Abduction Progress
Here is the progress on my Abduction composite thus far. So now the plan is to add the person basically, and integrate the elements a little more. Any comments and critiques would be greatly appreciated!

***Did some minor changes.. Took out my ghost (thanks Steve for pointing that out!) lightened the tractor beam and shaded in the UFO a bit more, I dont know if I did it too much though? It's hard to know where to draw the line...

Friday, March 25, 2011
VIC Itinerary

Dates: Wed 30th March - Sun 10th April (TBC)
I am preparing for bad weather so I have not booked any accommodation anywhere except Melbourne. I have bought a tent and decided to camp instead, this way I am able to stay as long as I want in any given location to make sure I get the shots I need.
Stop1: Melbourne
Stop2: Port Campbell
Stop3: Grampians National Park
Stop4: Mildura
Estimated driving time: 25 hours
Costs:
Accommodation: $150
Petrol: $250
Food: $400
Tent: $150
Total: $950
Stop1 - Melbourne
I will leave Canberra around 10am to arrive in Melbourne at about 7pm. I will be staying at a YHA hostel for 4 nights from Wednesday to Sunday.
Shots:
- Botanic Gardens - gazebo
- City at night
- Stock city shots, including alleyways
- Circus tents - Silvers Circus, Manningham club, Bulleen / Moscow Circus, Cranbourne road, Frankston

Stop2 - Port Campbell
After Melbourne I will be travelling down the Great Ocean Road towards Port Campbell to get photos of the 12 apostles, I will find an appropriate camping area and stay as long as necessary. I am mainly doing this as I have only seen them when I was very little so I am interested in doing some sight seeing just for the enjoyment factor, but I may use shots I take along the way as stock later down the track.
Shots:
- 12 apostles
- Any landscapes I find interesting along the Great Ocean Road

Stop3 - Grampians National Park
I will then drive up to the Grampians National Park to get some great landscape shots, including cliffs, waterfalls and forests. Camping is allowed throughout the national park so I will have no problem there. I found a useful sight listing suggested walks which I will be looking into:http://www.grampiansnationalpark.com/grampians/national/park/walks.asp#w_balconies
Shots:
- Balconies Lookout
- Waterfalls
- Forests
Stop4 - Mildura
My final stop is right up to Mildura, which is the main city near the Perry Sand Dunes, which will form the basis of my desert composite.
Shots:
- Sand Dunes

UFO tutorial
This is the tutorial I will be refering to when creating my UFO for my Abduction composite. The tutorial is a collaboration between Andrew Brooks and Adam Smith, and is found in issue 78 of the Advanced Photoshop magazine. I couldn't find an online copy, and I dont really see the point of scanning, as I have the hard copy, but I thought I would post images of it so you can get the general gist of the idea.


Thursday, March 24, 2011

Semester Plan
6 Fantasy Composites
For my fantasy composites I plan to challenge the perceptions of reality. I want my images to convey strong emotions, and have characteristics of a dreamlike state. I will be adopting a surrealist style for my composites, and draw upon photomanipulation artists such as Luis Beltran and Michal Karcz for inspiration (see below for examples). For these composites I intend on shooting the landscapes first, and the studio portraits second. As all of my landscapes will be shot using natural lighting, I have no control over where the light falls, In the studio however I can manipulate the light to match that of the landscapes, therefore making my composites more seamless.
The shot lists only include the major images I need - most of my composites will include many little aspects and artificial elements.
1. City Nightscape
This composite will be of a man looking over a city at night, with a dramatic starry sky with planets. I plan to paint the sky using Photoshop. This is one of my ideas I intend on building on a lot, as I dont have a solid idea of how I want it to look, and I want it to be original.
Shots I need:
- Man
- City - I plan to do nightshots of Sydney, Melbourne and Canberra and use parts of each.

2. The Room
For this image I want to turn a photograph of a rainforest into the walls of a room. I plan to include a window, in which there will be a desert scene. There will also be someone in the room, but what they will be doing is currently undetermined.
Shots I need:
- Rainforest - I plan to go up to the Dorrigo rainforest near Coffs Harbour.

- Desert - Perry sand dunes near Mildura
- Person
- Wooden floor

3. Oasis
This composite will be of someone riding a horse through the desert towards an oasis.
Shots I will need:
- Desert - Taken at the Perry sand dunes near Mildura.

- Tree and pond
- Person
- Horse
4. Leap
The idea for this one is to make it look like someone is leaping off a cliff. I was thinking about adding wings to the person, but I think this might make it look a bit too cliche. I was originally thinking of having a person sitting on the cliff, but thought it would be much more dramatic if I had them jumping.
Shots I will need:
- Cliff and landscape - I intend to shoot these at the Grampians National Park in Victoria, this way I wont need separate shots for the cliff and the landscape

- Woman - jumping with long hair and long flowing dress
5. Abduction
This composite will be of a UFO abduction. I plan to have a house, (which I will shoot at night and light up with a speedlight, and also use the speedlight to create a light spot where the tractor beam will be) and a girl holding a teddy bear being beamed up by an alien spaceship.
Shots I will need:
- House - I plan to do this at Orroral homestead, as a real house would be too cluttered and I will have more control over the homestead as it is not owned by anyone.

- Girl - Holding teddy bear and levitating
- UFO - I obviously can't take a picture of a UFO, but I will be painting this in in Photoshop using other artworks and models for reference
6. Wizard
I haven't finalized my idea for this composite yet, but I want to have a wizard in a mountainous area performing a spell of some kind. It will most likely have a dark style to it and the spell will be painted in in photoshop.
Shots I will need:
- Wizard - Old man in a grey cloak
- Mountains - I will see what I get out of the Grampians National Park and decide if I need to shoot elsewhere. I will most likely end up merging multiple landscape shots together
4 Magazine Covers
For my magazine covers I have chosen 4 different personalities / professions that I can link appropriate backgrounds to. I will be shooting all of my portraits waist up or head and shoulders, as the focus of magazine covers is on the persons face. For this series it doesn't matter if the portrait is shot before the landscapes, as I will not be 'inserting' them into the landscape, merely placing them on top.
1. Zoologist
My first composite is of a zoo keeper or zoologist, so the portrait is going to be someone dressed in khaki with animals behind him.
2. Clown
My second magazine cover is going to be of a clown. It will be an older man with his face painted and a clown suit, with circus tents, a ferris wheel, balloons etc in the background.
3. Pirate
Another composite is of a pirate, with an ocean, islands and his ship in the background.
4. Noblewoman
My final magazine cover is of a noble woman, most likely set in the 1800s, with extravagant clothing. In the background will be luscious gardens, a pond and a gazebo.
5 Advertisement Campaigns
My final 5 composites are of advertisement campaigns. I have to choose 5 existing campaigns and plan a composite that will fit the campaign. With most of the campaigns I will be shooting the landscapes first and then the portraits. With the product campaigns however it doesn't matter if I shoot the products first as the lighting on products is always perfect.
1.L'Occitane
My first product composite will be reasonably simple. I will just take a photo of a product in the studio and make a pretty background out of a nice sky and flowers.

2. Panasonic 3D TV
This composite is based on a graphically drawn advertisement, but I will obviously be using photography. The concept is that the TV is so realistic that the character escapes out of the TV, and the person is telling it to get back in. As I am a beginner in Photoshop painting my character will be of human form, most likely a Spartan warrior.

3. Subaru
Again the car in this advertisement is a 3D rendering, but I will be taking a photograph in the studio. The tagline of this ad is 'Performance Enhanced' and pictures a horse that has been modified to be better. I will be doing a similar thing by modifying a person with computer, car and speaker parts. I am yet to decide on the location.

4. Spring Valley
This advertisement is of juice where a beautiful oasis is sits on top. I will need to combine different photos of trees and water to make it look like it does in the advertisements.

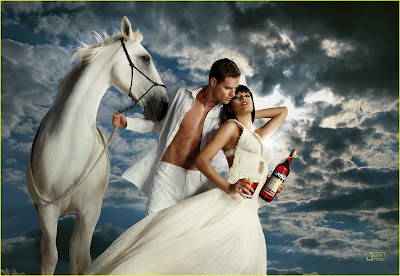
5. Campari
This is my favourite campaign of the 5 I have chosen. There are 12 images in this series all depicting characters from famous fairy tales. The image portrays powerful women figures with a bottle of campari, and often half naked men pining over them. I will be doing a composite of Rapunzel, and have her sitting in a tower with a campari cocktail and a bottle sitting on the sill. A man will be waiting below. I will be painting most of the hair in Photoshop.

Images from: (in order)
Subscribe to:
Posts (Atom)